Showing posts with label Stamping. Show all posts

Friends Couch Stamp Card

Happy Monday!

This Monday I have a card to share using Ink Roads The one with all the stamps set. Friends is my favorite show ever. I have seen every episode multiple times. 


This card was fun to make and came together fairly fast.  The most time consuming part was stamping the sentiment over and over on the background paper.  


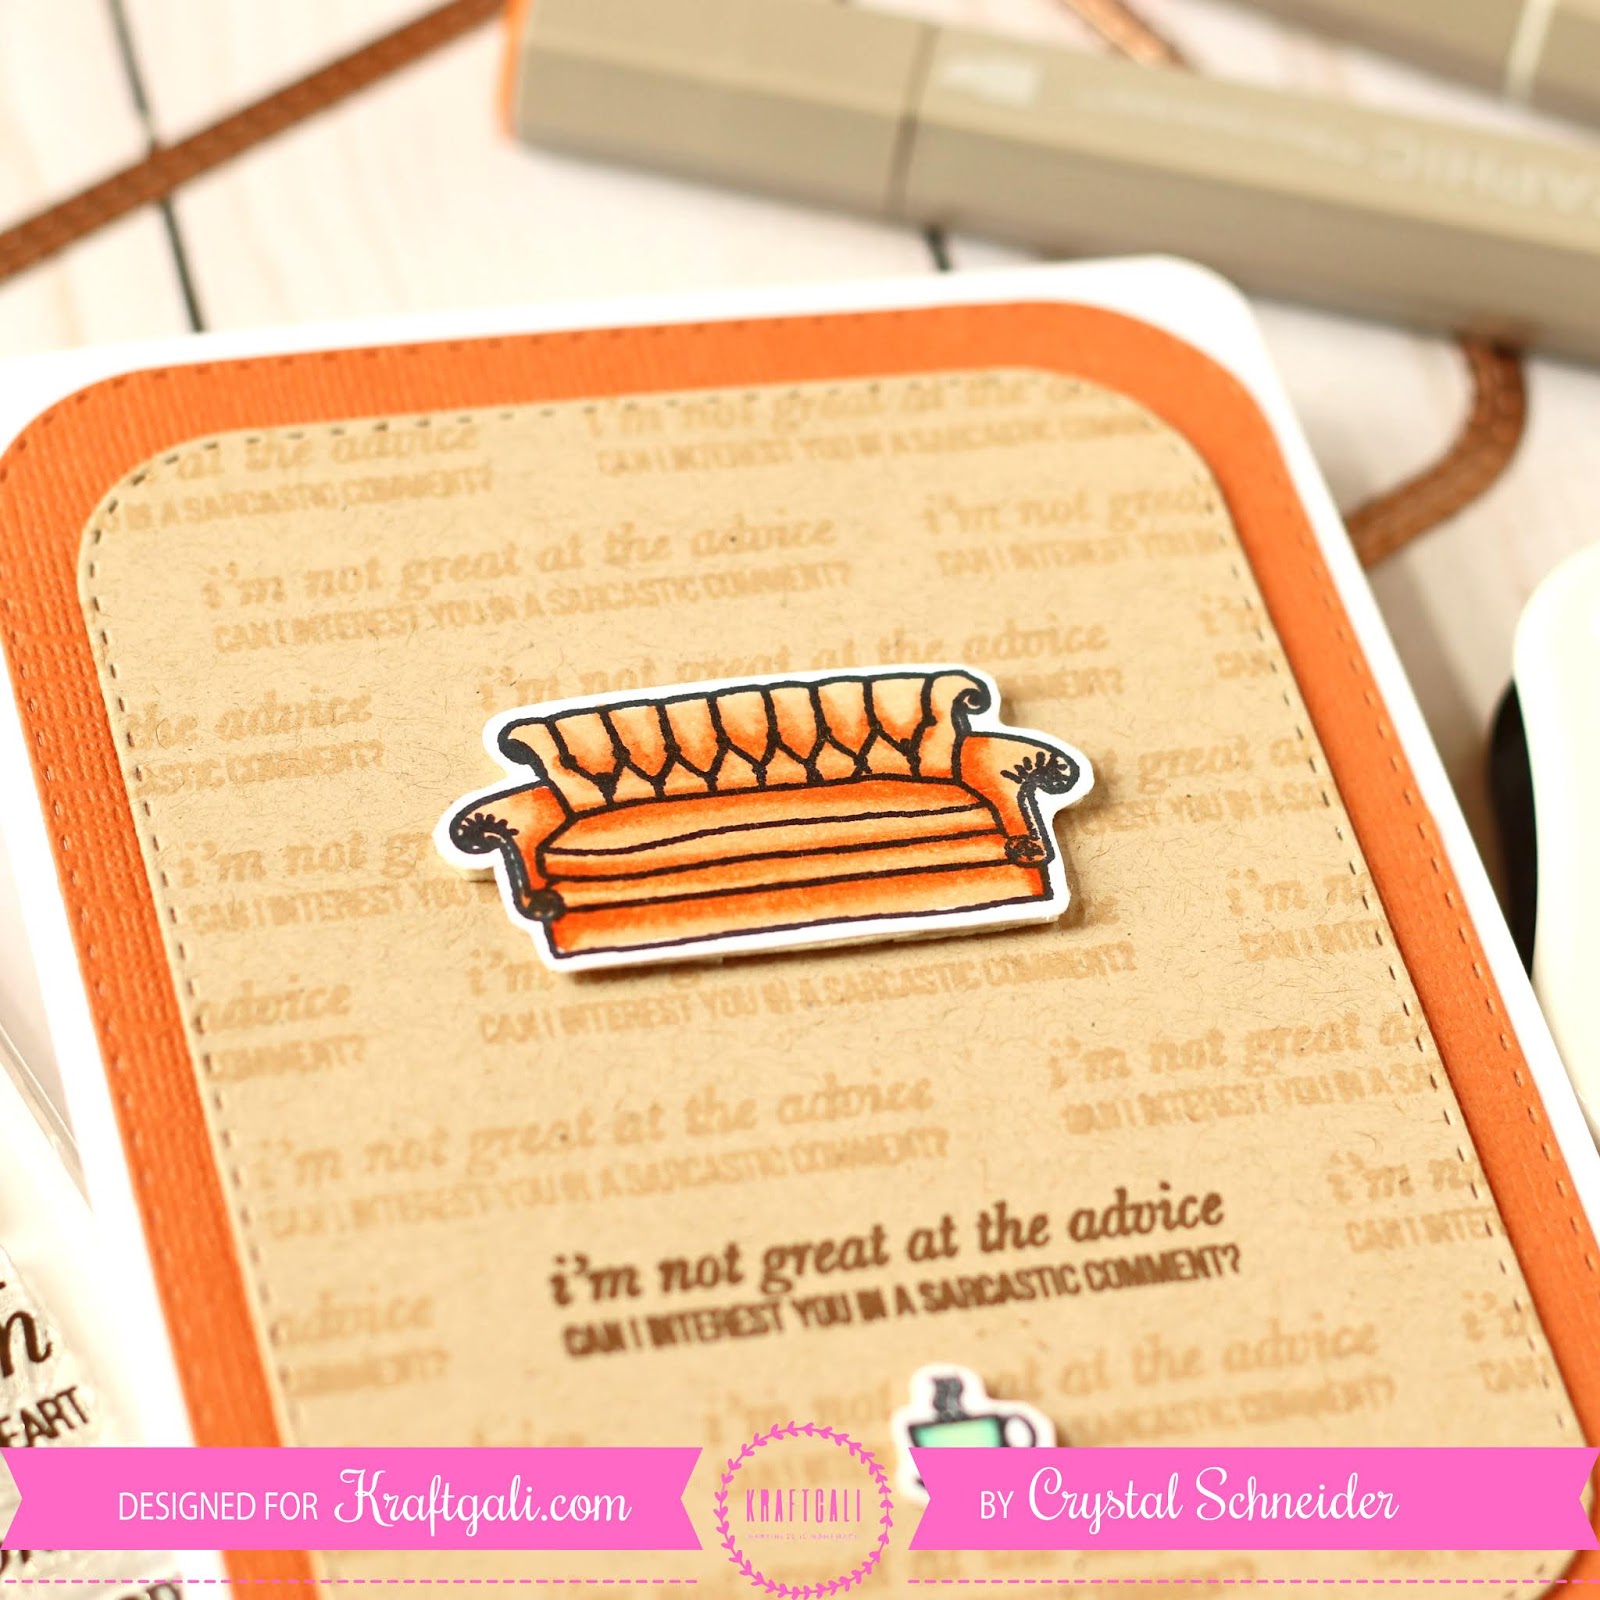
I stamped the sentiment all over in a light brow then once in a dark brown to help it stand out. "i'm not great at the advice CAN I INTEREST YOU IN A SARCASTIC COMMENT?" 


I stamped the couch and coffee cup onto smooth white card stock in Memento ink and colored them in with alcohol markers. I then fussy cut them out. 


I matted the background paper onto orange cardstock to match the couch. I adhered the couch and coffee cup to the Kraft cardstock with foam tape for some dimension. I then adhered the whole panel to a 5 1/2" x 4 1/4" card base. 


Have a great week! 

~Crystal 


Go Wild Birthday Cards

Hi crafty friends! 
Happy Monday hope you had a great weekend! 


This week I have a few cards to share with you that I made using Wild Ones by Neat and Tangled.


For my first card I stamped the images onto watercolor paper with versafine black ink. I colored them in with Arteza Real Brush pens. Then I fussy cut the images out.


For this card I used the sentiment from the Sending Hugs stamp set by Newtons Nook Designs. I used a yellow pattern paper to frame the design. Green pattern paper as the grass and some blue and white strip paper for the sky. I then adhered the whole panel to a 5 1/2"X 4 1/4" card base. 


For my second card I wanted to play with masking. I love masking but some times I struggle with the order of the stamping so I started out easy with this one. I stamped the turtle and bird first masked them and then stamped the giraffe and gift. I stamped them all with Memento black ink so I could color them in with alcohol markers. After I colored them in I die cut them out with a rectangle double stitched die.


For the sentiment I stamped "GO WILD" and heat set it with Gold WOW embossing-powder. I stamped the second part of the sentiment "PARTY ANIMAL" in black ink. Then I took some pink cardstock and die cut a rectangle with rounded corners. I matted the top panel onto the pink paper. I then adhered the whole panel to a 5 1/2"X 4 1/4" card base. 


For my last card I have to share today I wanted to play with masking again I wanted the cut little monkey to be riding the giraffe. I love the look of white embossing one black cardstock so I die cut a banner and stamped "GO WILD!" onto the black cardstock and heat set it with Opaque Bright White WOW embossing and stamped "PARTY ANIMAL" down the side.

To add a little interest to the card I ran my cardstock through my die cutting machine in a polka dot embossing folder. Then inked it with a darker shade of purple ink to help the polka dots pop off the page. I then adhered the whole panel to a 5 1/2"X 4 1/4" card base. 

Thanks for stopping by today see you next Monday! 

Happy Spring

Hi crafty friends!

I'm over this winter weather so this week I played with Lawn Fawn's cute Easter Party stamp set. 


I stamped the adorable flower girls onto Spectrum Noir Smooth cardstock in black Memento ink so I could color them in with alcohol markers. I colored each of them different colors. Then I fussy cut them out I like fussy cutting but if you don't they do have matching dies.


To add some dimension to the card I embossed some clouds onto blue cardstock for  the sky and inked it with a blue ink. Embossed polka dots to green cardstock and inked it with green ink. I like to add ink after I emboss to help the embossing pop off the page a little bit. I used a double stitched rectangle die to layer my paper onto a 5 1/2" X 4 1/4" top folding  card base. 


I die cut a banner and stamped the "Happy Spring" sentiment onto the center of the banner. 


Thanks for stopping by today!

~Crystal 

Newtons Nook Sending Hugs

Hi crafty friends! 
This week I played with Newtons Nook's Sending Hugs stamp set.


I never have a plan when making a card so I made a mask for the bear and the gift I thought I would keep him on the paper and mask him off for inking but ended up fussy cutting. I only used the mask for the bear so I could stamp the gift with him holding it. 


I used my stamp platform to help me stamp the background. I stamped everything in Memento Black ink. Then  colored in all of the images with alcohol markers. I didn't do any shading since the images are so small. 


I did make a little mistake you can see it up on the right towards the top so my design of the card would need to cover it up. After the coloring was done I inked the edges with blue ink.


I matted the colored page with Kraft cardstock and die cut two banners for the sentiment. I stamped the Sentiment with Versafine Black ink. 


I added some black Nuvo drops on his eyes and on his nose to help them pop a little bit. 


Thanks for stopping by today!

~Crystal 

First Design Team Project- City Stacks

Hi crafty friends it's Crystal here today I'm super excited to be sharing my first design team post for Kraftgali. 


This week I thought I would play with this fun stamp set City Stacks by Concord & 9th. This stamp set is adorable and so many options I will be using this set many times in the future.


I started our with stamping all of the image onto some white paper scraps I knew I would be fussy cutting them out. I stamped in Momento black ink so I could color them in with Alcohol markers. When I had all of the images colored in I fussy cut them then I set them aside to work on my card base. 


I inked the almost the whole front of my card base with  a dark blue ink because I wanted to do a night scene on my card. I went over it a couple times to get it really dark. 


Once the ink is completely dry I stamped the sentiment up on the top right corner with VersaMark and stamped stars all over the sky. I added Metallic Gold Wow embossing powder on all of my stamped images and heat set them. 

After all of the stamping was done I ended up cutting the last house off and cutting the trees apart. I used Scotch Foam Mounting Tape to add dimension to all of the layers. 


Here is a close up of the sentiment. I love it so much I is just perfect to send to a friend who lives faraway to let them know you are thinking of them. 


Have a great day I look forward to seeing you all next week!

~Crystal 


Distress Oxide Techniques + Graduation Cards

Hello & welcome to another Kraftgali blog post & video.

Today, we are having so much fun making these graduation cards featuring some distress oxide inks.


To begin with, I wanted to apologize for the lighting & filming variations you will come across in the video as I had struggled to complete this recording in several days.


The stamp set featured in today's video - Newtons Graduation Stamps set by Newton's Nook Designs. I am using the Tim Holtz Stamp Platform to stamp the cat images multiple times. The images are colored using Prismacolor premier color pencils.

Newton's Graduation - Newton Nook Designs Stamps Set


For the first card background, I have used Distress Oxide inks in a rainbow color order. I have used Concord & 9th All About You Dies Set along with  Newtons Graduation Stamps set.


Colors Being Used in Rainbow Fashion-
1. Wilted Violet
2. Faded Jeans
3. Broken China
4. Peeled Paint
5. Fossilized Amber
6. Spiced Marmalade
7. Fired Brick

I have also used Tattered Angels glimmer mist in all of the cards today to add some sparkle and shine. Xyron Adhesive Eraser is one of my favorite tools handy to prevent any adhesive accidents.

For the second card, I have created the background using distress oxides on Canson Montval watercolor paper and adhered the stamped & colored image on it. I literally spent more than 2 hours playing on this background as it was so much fun! Distress oxide inks are very forgiving. I love it!


For the third card, I have used ALPHABET Dies to die cut the word CONGRATS. I have used an old Quinn's ABC Lawn Fawn Die Set in my video. Link to Other Dies set Here - ALPHABET Dies. I kept the card simple to let the focus stay on the shiny dimensional alpabets created using Distress Oxides.


The alphabets in the BONUS card shown in the video is created using a thick (2.5 inch) washi tape.


Next, I need to find new graduates to send these cards to! 😍😍😍


Thank you for spending time with me today! Hope you have a good weekend. Happy Crafting :)
xo

Princy

A card for Kraftgali spring challenge by Noga Shefer

Hi Crafty Friends! I’ts Noga and today I'm here to share a card for Kraftgali spring challenge!!


The base of the cards was cut from white cardstock using the frame die from Outside in stitched rectangle stackables Dies - Lawn Fawn .


the sheeps were stamped from the stamp set Missing Ewe Stamps - Sunny Studio Stamps on smooth white cardstock using Jet Black Ink, colored in with Copic Markers 0, W0, W1, E000 and R20.

The grass and sky were colored with distress oxide inks using Tim Holtz Distress INK BLENDING TOOL 1" ROUND Ranger


For this project I used:


Get yours at kraftgali now!


Happy crafting :)


xoxo


Noga Shefer


A baby girl card by Noga Shefer


Hi Crafty Friends! I’ts Noga and today I'm here to share a baby girl card.


I stamped Concord and 9th Polka Dot Turnabout Stamps two times with Tim Holtz tattered rose Distress Oxide Ink and Tim Holtz aged mahogany Distress Oxide Ink from the new bundle - Tim Holtz Distress Oxide NEW Ink Pads BUNDLE OF 12 .


The base of the cards was cut from white cardstock using the frame die from Frames & Flags Die Set - Newton's Nook Designs .


To create the circle, I use a heart die cut from  Outside in stitched circle stackables dies - Lawn Fawn  


The sentiment was stamped with a greeting from the stamp set Birthday Balloon Stamps- Sunny Studio Stamps

with Tim Holtz aged mahogany Distress Oxide Ink Pad and was embossing.


The baloon was stamped with a stamp from the stamp set Birthday Balloon Stamps- Sunny Studio Stamps in 2 layers: first layer - UNICORN White-HERO HUES PIGMENT Stamp Pad  ,second layer:  Tim Holtz tattered rose Distress Oxide Ink Pad from the new bundle Tim Holtz Distress Oxide NEW Ink Pads BUNDLE OF 12 and was covered with Glossy Accents.


Happy crafting:)

XOXO

Noga Shefer

A birthday card with new sunny studio stamps by Noga Shefer

Hi Crafty Friends! I’ts Noga and today I'm here to share a birthday card.


The base of the cards was cut from light blue cardstock using stitched cloud backdrop landscape frame die from Lawn Fawn.

The sentiment was stamped with a greeting from the stamp set Birthday Balloon Stamps- Sunny Studio Stamps and was embossing with white embossing powder.

the sheep was stamped from the stamp set Missing Ewe Stamps - Sunny Studio Stamps on smooth white cardstock using Jet Black Ink, colored in with Copic Markers 0, W0, W1, E000 and R20.


The baloon was stamped with a stamp from the stamp set Birthday Balloon Stamps- Sunny Studio Stamps in 3 layers: first layer - UNICORN White-HERO HUES PIGMENT Stamp Pad  ,second layer:  Tim Holtz Distress Oxide Ink Pad worn lipstick and the last layer
Tim Holtz Distress Oxide Ink Pad picked raspberry.
 
Tim Holtz Distress Oxide NEW Ink Pads BUNDLE OF 12 are available now.


XOXO

Noga Shefer


Two cards For Kraftgali first challenge by Noga Shefer

Hi Crafty Friends! I’ts Noga and today I'm here to share two cards for Kraftgali first challenge.


The base of the cards was cut from white cardstock using the frame die from Frames & Flags Die Set - Newton's Nook Designs .


To create the heart, I use a heart die cut from Outside in Stitched Heart Stackables - Lawn Fawn.


These dies set are available now -Outside in Stitched Heart Stackables - Lawn Fawn.


The sentiment was stamped with a greeting from the stamp set Love Bites Stamps Set - Newton's Nook Designs with Tim Holtz black soot Distress Oxide Ink Pad and was embossing.


In the yellow card: the toast was stamped from the stamp set Love Bites Stamps Set - Newton's Nook Designs on smooth white cardstock using Jet Black Ink, colored in with Copic Markers E53,E51, E35, E33 ,E29 and R20 .

The jam colored in with Copic Markers: R29, R35, R37, R59, E51, E000 and R20 and the top was covered with  Wink Of Stella Glitter Brush Pen - Clear.


In the pink card: the muffin was stamped from the stamp set Love Bites Stamps Set - Newton's Nook Designs on smooth white cardstock using Jet Black Ink, colored in with Copic Markers-
 E33, E37,E51, E53, R20, RV02, RV10 and R85:

The little heart was covered with    Wink Of Stella Glitter Brush Pen - Clear.


Happy crafting:)

XOXO

Noga Shefer