Easter Chicks by Avery Elle | Kraftgali

Hello everyone, thank you so much for stopping by the blog.  Today’s project for Kraftgali features this adorable Easter Chicks set by Avery Elle.  It is just so fun to play with.  I didn’t want to leave out any of the images so this card will include every last one!  I am doing a bit of masking on the card as well so that I can try to keep it as flat as possible.  Also, when images are this small, it is a little bit harder to cut them out so masking is a great way to be able to color both the images and the backgrounds on the same piece of cardstock.  Lastly, we are pulling this card together with lots of Distress Oxide and just a little bit of alcohol marker coloring.  Thanks so much for stopping by! 


A Sweet Pet Sympathy Interactive Card

Hello my crafty friends!
Do I have a fun interactive card for you today!  I have been wanting to make this rain effect card ever since I saw Laura Dovalo create her amazing rain shaker card.  Here is the link to her video tutorial on rain shaker card as you will want to try this genius idea!


To start my card I created a card base of 5 x 6 1/2 from thick white cardstock.  The next step I trimmed watercolor paper a little smaller than my card base and inked with oxide inks in blueprint sketch, shaded lilac, and milled lavender.  I always use watercolor paper for my oxide inks because it gives such a smooth blend between colors, you can find some watercolor paper here.

I adhered this to the card base and using a ruler, marked my measured lines on the top and bottom and adhered the clear sewing thread with gold beads.  This is where you can follow Laura Dovalo's video tutorial, link above.


The adding beads and thread is time consuming but sooo worth it, especially when you can play with it when done! 
For the rest of the card, I die cut some stitched scalloped clouds from thick white cardstock and stamped the sentiment along the bottom one.  I added these with extra high pop dots to let the beads move freely under them. 
I stamped the ever adorable kitties from Avery Elle's All of Us stamp set, loving that they are all together and no masking required!  I colored them with copic markers and fussy cut them out. 


I added two rows, pop dotting behind each layer to give depth and added the cloud over the bottom row of kitties.  Next to the sentiment, I added one little kitty on a stitched cloud and added a silver glitter heart.  I kept it simple since it is a pet sympathy card and I wanted the rain effect to be the focus. 

Here is a video of how it looks when you move the card:


I hope I have inspired you to try this out, the tutorial really explains well how to create the effect.  I would love to see your creations, please share them with us at Kraftgali Fan Club on Facebook!
Until next Thursday, happy crafting!

Candice

Happy Easter Card Set

Hi crafty friends! I'm back again this Monday morning to share a  couple cards made with the Lawn FawnEaster Party stamps set

For all three cards I used Lawn FawnCelebration Scripty Sentiments stamp set. I will be using this sentiment set alot. I love how it fits across a A2 card perfectly. For all three cards I stamped them with black Versafine ink and heat set glitter embossing powder on them. All of the images I stmaped onto water color paper with Versafine black ink and heat embossed with clear embossing powder. I colored them all in with Arteza Real Brush markers and fussy cut them out.


This first card I die cut a large stitched rectangle out of yellow pattern paper and adhered it to a 5 1/5"X 4 1/4" card base. For some thing bold I die cut a smaller rectangle out of bold black polka dot pattern paper. 

I adhered three flower girls and attached a row of flowers in front of them. Then I attached the sentiment below the flowers to finish of the card.


The second card was a little more simple. I used solid paper in bold colors. I adhered the bright pink frame with foam tape to give more dimension to the card.


I adhered the flower girl and the sentiment with foam tape. The whole panel was adhered to a 5 1/5"X 4 1/4" card base. 


The last card I used more soft colored cardstock.


I adhered the little flower girl and duck to green and blue cardstock to have them look like they are standing outside. The whole panel then was adhered to a 5 1/5"X 4 1/4" card base. 

Thanks for stopping by today! 


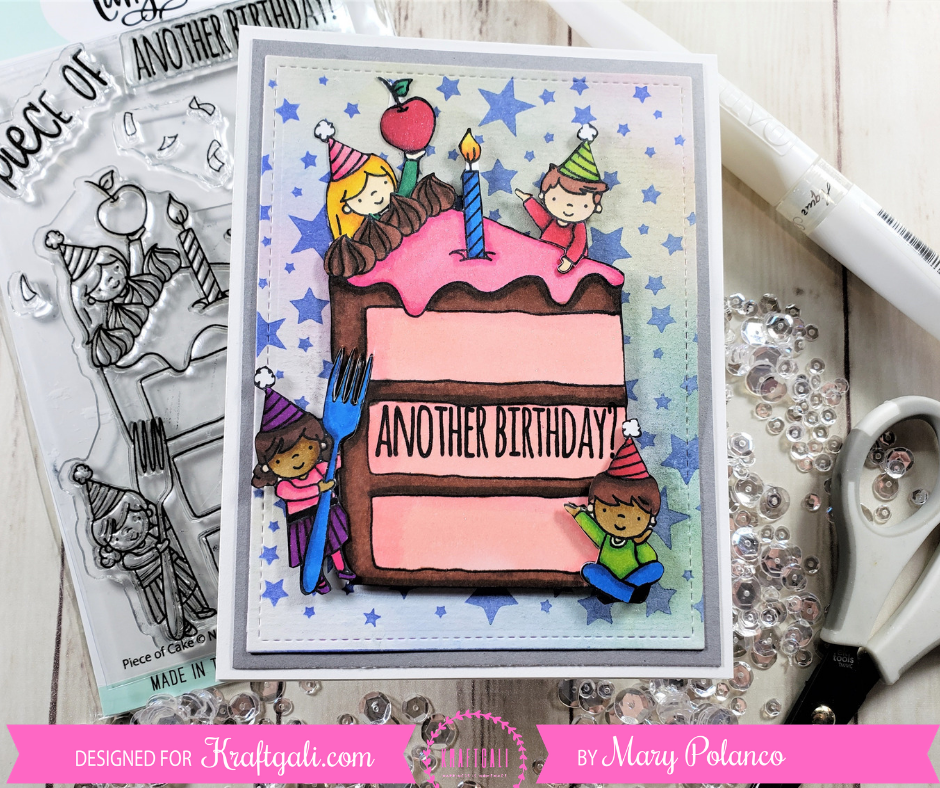
Neat & Tangled Piece of Cake

Hey everyone! Today’s Kraftgali Design Team Project focuses on how we can stretch our supplies a little bit and find multiple uses for large-image stamps. This Neat & Tangled Piece of Cake stamp is perfect for the demo! The first way is simply stamping and coloring; virtually a one layer card.  The second technique is where we cut it out and layer it up putting the images on different levels.  Lastly, the easiest way to use this adorable stamp is to simply stamp and emboss it on the cardstock of your choice and finish it off with any embellishment you like.  Thanks so much for stopping by.


Happy Trails from Lawn Fawn

Hello to a fabulous Friday!

Today I have a bright and fun interactive card for you using lots of Lawn Fawn products from the Kraftgali's online shop!


I started my card with a 5 x 61/2 card base of thick white cardstock.  I then die cut a cloud printed acetate sheet and adhered to the center.  I set that aside while I made the interactive piece. 

For the changing picture, I colored a square on a larger piece of marker paper with a grey copic marker, stamped the rain scene and sentiment, and colored the clouds a bit more with copics.  Next, I die cut this piece with the straight edge die from the magic picture changer dies.

I stamped the rainbow, colored with copic markers, colored around the rainbow in light blue, and then stamped the sentiment.  Next, I die cut this piece with the diagonal edge die from the magic picture changer dies.

I rubbed both of them with the anti-static pouch to help the pictures move easier.  I then put the two together and added the blue polka dot cover from the Magic Picture Changer add-on and the tab.  I did reinforce the pull tab with an extra strip die cut from white to keep the pull tab sturdy.


I pop dotted my whole interactive piece to the front of the card and started on the scene.  For the scene, I die cut trees, a cloud and a sun and colored with copic markers in rainbow adding them with glue and pop dots for varying heights. 
Next, I stamped the road using an old stamp that is for notepaper lines (love using stamps for different purposes!), and colored with copics.
I used the Happy Trails stamp set to stamp the car, camper, and smoke and colored those with the copic markers too.  I fussy cut them out and added them to the card. 


For the final touch, I stamped the sentiment on a banner die from the Lawn Fawn double slider die set.

I hope I inspired you to try some bright colors on your next creations and remember to share them with us at the Kraftgali Fan Club on FB!

Take a peek at the Kraftgali shop, she still has everything on sale!

Thanks for stopping by, and starting next week, I will be posting on Thursdays, so visit me one day earlier!

Candice

Happy Easter Shaker Cards

Hi Crafty friends! 
This week I played with this adorable little Easter Chicks Clear Stamps. I love this stamp set it is little but so many fun ways to use it. One of the cards I used this Bohemian Bouquet field of daisies stencil. On all three cards I heat embossed clear embossing powder on black on watercolor cardstock and colored them in with Arteza Real brush markers. 

The first card I made was very simple I just layered different die cut pattern pieces of paper and layered them. 


My last two cards I made shaker cards. I'm really loving shaker cards right now. 


This shaker card I adhered the chicks to the front of the acetate and everything else inside.


On this card I used the stencil with purple ink onto purple cardstock. This shaker card I adhered the chicks inside of the shaker card.


Thanks for stopping by have a great week and see you next Monday! 

Spring Cards with Memory Box Bright Hearts Die | Kraftgali

Hello everyone!  Today we are doing to make spring cards from just dies and ink!  This Memory Box heart die is so pretty and can be used in the positive or negative form.  Let’s spring it up!! I don't know how you feel but I am definitely ready for Winter to be over!  So let's channel some sun and warm weather with our project today.