Neat & Tangled Stay Cool slim line card

Hi to all Kraftgali friends!

This Friday I am bringing you the ever addicting slim line card!  I LOVE making these long cards because I can use all the cuties in a stamp set on one card! Yeah!  For this slim line card I used the adorable friends from Neat & Tangled Stay Cool stamp set.


This was a quick card, I finished it in a couple hours (even while watching Netflix)!  The Stay Cool stamp set is easy to color, a lot of  it is just shadowing. 

I started the slim line card by trimming an 81/2 x 11 sheet of 110lb white cardstock to 8 x 10 and scoring on the 8" side to make the card base 4 x 10.  I then trimmed another piece of thick white cardstock to fit a little smaller on the front.  Next, I stamped the snowflakes and heat embossed with white embossing powder on the top half of the sheet.  I inked over the snowflakes with oxide inks in mustard seed & squeezed lemonade. 


I die cut the stitched mountains and glued to the bottom of the snowflakes paper and stamped the sentiments in black ink near the top.  I then die cut the Altenew hugs script die from purple glitter paper and some scraps of thick white cardstock and layered to make a thick word embellishment.  One of my favorite techniques to add different fonts in my sentiments!


I stamped all of the cuties from the Neat & Tangled Stay Cool stamp set with memento black ink, colored with copics, and fussy cut out.  I pop dotted all of them and glued down the ice hole and water.  And it's done!  Love the colors of this fun winter card!


If you haven't tried making a long card, try it today or this week with your favorite stamp set!  Or check out all the amazing stamp sets she has at Kraftgali.com, she has so many top brands!

Please share your slim line cards with us at Kraftgali fan club on FB!  I would love to see your creations!

Thanks again for stopping by with me today!

Candice

Slider Switch Technique - Light Up Cards Part II

Hi, Welcome to TenTen Crafts!! 

This Video is part 2 of our YouTube series 'Light up YOUR Cards'. If you are new to light up cards, I recommend you checking out the first video of this series HERE and come back.☺

In this video, I show how to create a simple Slider switch using paper circuits.


You will need –
Coin cell battery,
Conductive foil tape,
Led light

All of these come together handy in the starter kit from Chibitronics for ease of use. These LED stickers by Chibitronics are a great & easy way to add a fun, interactive element to your cards.

Click here to download ------ Templates and Measurements

Our circuit is going to complete only when the slider is at the bottom. Remember to use one continuous strip for each line as separate foil pieces taped together would not create a strong connection and the led might not work in some cases.


Click here to download ------ Templates and Measurements

Please stay tuned for my next video with a full tutorial on how I created this fun see-through card using this slider switch technique.


------ SUPPLIES ------ These are the main supplies used. Affiliate links used at no cost to you. • Chibitronics LED Stickers Intro Kit ——— https://amzn.to/2GzDRFz [ Amazon US ] • Chibitronics LED Stickers - White - 30 pack ——— https://amzn.to/2WSJGnu [ Amazon US ] • Chibitronics LED Stickers - Red, Yellow, Blue - 10 each ——— https://amzn.to/2GA9sa8 [ Amazon US ] • Chibitronics LED Stickers - Pink, Orange, Green - 10 each ——— https://amzn.to/2MWnWSY [ Amazon US ] • Chibitronics LED Circuit Stickers STEM Kit ——— https://amzn.to/2MXMBGT [ Amazon US ] • Chibitronics Copper Tape ——— https://amzn.to/2WTrdXR [ Amazon US ] • 4 Pack Copper Foil Tape ——— https://amzn.to/2GzconB [ Amazon US ] • Neenah 110lb White Cardstock 8.5"X11" ——— https://amzn.to/2GxCkjA [ Amazon US ]


Hope the video was helpful. I will see you again soon!

Mouse Tea Party...

Hi crafty peeps, I am happy to be back here sharing my latest make for Kraftgali. I created a cute little explosion card box.


This cute stamp set is called Mouse Tea Party and it has lots of elements for making a truly unique creation! I created an explosion box then added photo like elements to set my images on for something just a little bit different. Each one stands out on it own.


Don't forget to stop by the Facebook fan group , their Pinterest page and their Instagram for more fun inspiration to get you started on your next project!  Happy crafting!!  Carolyn

Sunny Studios Devoted Doggies Valentine's Day Card

Hello Crafty Friends - Annie here with a cute Valentine's Day Card.

So, if your family is anything like mine when it comes to our pets - we celebrate everything with them. As we feel they are a part of our family. We give them cards and have them give cards.

I created this card for my husband from our sweet 1.5 years Pitbull named Echo. 
He is super loving and just adores my husband - as much as my husband adores him.

I used Sunny Studios Devoted Doggies Stamp set to create the card. 

I colored one of the doggies to look like our Echo. I also used the dog bone and paw print to create a heart.  Then, I die cut inside the bone and paw heart. Popped up the front panel and backed it with dark red cardstock. I popped up the little doggie in the center of the heart. Stamped the sentiment onto medium gray cardstock - heat embossed it with white embossing powder. Finally, stamped a few more paw prints and for a finishing touch add a few red sequin hearts.


I hope you give Sunny Studios Devoted Doggies Stamp set  a try!

I would like to thank you for stopping by the blog today.

There is so much more to discover in the store so don't hesitate to stop in and check it out. Also, check out the Kraftgali Fan Page on Facebook, on Pinterestand on Instagram to connect with other Kraftgali fans and share your work.  Have a crafty day!

Two Llama cards and Mirror Stamping

Hi crafty friends! 
I love all things llama my husband even bought me a stuffed one for Christmas. Llamas have become so popular lately for card, pillows, blankets, and clothes. 

I used the Llama Love set by Sizzix this week. This set was so fun I have two cards to share but I'm sure I will be making many more.


My first card I did a mirror image of the Llama. If you have never tried mirror image stamping it is really easy. I know their are many different ways to do it. The way I do it is just to stamp onto a piece of acetate then I lay the acetate onto my paper and press evenly around the image to press it onto the paper. I had to be careful not to slide the acetate. 


This is my mirror image llama. After I stamped it onto the paper I went over it with a alcohol marker safe pen to crisp up the lines a little bit better.  I did move a little bit and blurred some of the lines a little bit but once it was colored in you can't really notice. I didn't get the blanket very clearly stamped so ended up not drawing in all of the details so it would be a little bit different then the other llama.


I added some Nuvo Drops onto the circles on both llamas for a little added detail.


I stamped the sentiment onto black paper and heat embossed it with white embossing powder. 


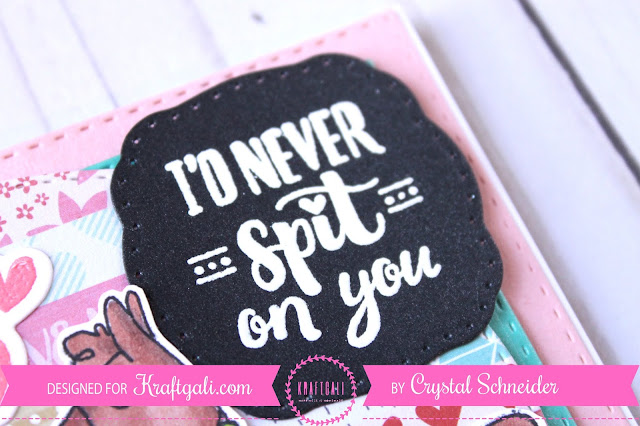
My second card was a little more simple I just stamped the I llama llove you sentiment, the llama, and hearts. I colored the llama in. Then I die cut everything out and layered with a mix of solid and pattern cardstock. 


Thanks for stopping by today! Hope you are enjoying your weekend!

Crystal 

Light-up Cards - Part I

Hi,
Welcome to TenTen Crafts!!

This BLOG POST is part of our YouTube series 'Light up YOUR Cards' showing how to make light up cards for ALL skill levels.

Come along as I show you how to make simple and parallel circuits using Chibi lights. As we proceed, become a PRO & Go beyond creating simple and parallel circuits, and focus on more interactive pieces such as switches and other interactions.


I show some simple mistakes and fun tips to make your cards light up!! Watch YouTube Video for full tutorial -- https://goo.gl/xa8Sta


You will need –
Coin cell battery,
Conductive foil tape,
Led light

All of these come together handy in the starter kit from Chibitronics for ease of use. These LED stickers by Chibitronics are a great & easy way to add a fun, interactive element to your cards. I have also used Love Letters stamp set by Lawn Fawn.

Circuit Templates and Sketch Book Can Be Downloaded from Here -- https://goo.gl/uT3P3d

Here’s a tip for you - remember to use one continuous strip for each line as separate foil pieces taped together would not create a strong connection and the led might not work in some cases. Also, watch your fingers – copper tape can be sharp.


Here is another card I made at this year’s Creativation craft show that uses a BLUE LED sticker light.

I hope the information was helpful to you. I appreciate you spending time with me!

------ SUPPLIES ------

• Chibitronics LED Stickers Intro Kit
 ——— https://amzn.to/2GzDRFz [ Amazon US ]

• Lawn Fawn Love Letters Clear Stamp
 ——— https://amzn.to/2MXIIS9 [ Amazon US ]

• Lawn Fawn Paper Pack Perfectly Plaid Spring
 ——— https://amzn.to/2tiQf4V [ Amazon US ]

• Lawn Fawn Cross Stitched Rectangle
 ——— https://amzn.to/2WTVtBL [ Amazon US ]

• Chibitronics LED Stickers - White - 30 pack
 ——— https://amzn.to/2WSJGnu [ Amazon US ]

• Chibitronics LED Stickers - Red, Yellow, Blue - 10 each
 ——— https://amzn.to/2GA9sa8 [ Amazon US ]

• Chibitronics LED Stickers - Pink, Orange, Green - 10 each
 ——— https://amzn.to/2MWnWSY [ Amazon US ]

• Chibitronics LED Circuit Stickers STEM Kit
 ——— https://amzn.to/2MXMBGT [ Amazon US ]

• Chibitronics Copper Tape
 ——— https://amzn.to/2WTrdXR [ Amazon US ]

• 4 Pack Copper Foil Tape
 ——— https://amzn.to/2GzconB [ Amazon US ]

• Lawn Fawn Love letters Stamp & Die Set
 ——— https://amzn.to/2MWMqeS [ Amazon US ]

• Tsukineko VF000082 Full-Size VersaFine Instant Dry Pigment Ink, Onyx Black
 ——— https://amzn.to/2MY7ZMd [ Amazon US ]

• Ranger Clear Embossing Powder
 ——— https://goo.gl/RxVfYn [Kraftgali]
 ——— https://amzn.to/2MY85n3 [ Amazon US ]

• Copic Ciao Markers 24pc Basic Set
 ——— https://amzn.to/2IgUc4P [ Amazon US ]

• Neenah 110lb White Cardstock 8.5"X11"
 ——— https://amzn.to/2GxCkjA [ Amazon US ]

x

Lawn Fawn I Love You (Calyptus)


Hello everyone! Today's Kraftgali design team project focuses on using your small stamp sets in a big way.  They are a great price point so finding ways to use them in order to fill up your card front, is a great thing.  Today, we are using Lawn Fawn's I Love You (Calyptus).  These Koalas are just too cute...so let's stack 'em up!  Thanks so much for stopping by.
Kraftgali Shop